Welcome to Laser Pointer Forums - discuss green laser pointers, blue laser pointers, and all types of lasers

LPF Donation via Stripe | LPF Donation - Other Methods

Links below open in new window

ArcticMyst Security by Avery

The Green Gargoyle 10.08 W @ 520nm

Joined
Feb 25, 2010
Messages
1,643
Points
113
Thanx LS for your insight ! So far....the Extrusion Heat sink stock I have located is only 10mm tall section...36mm OD......so....I will have to stack eight units to obtain 80mm !! Also....I will have to bore thru to make an opening to form a ID hole.

I was thinking of taking a section of CU pipe...and stringing the extrusions sections end to end.

Still some details to be worked out in this area !

See here....


Maybe I can find a more suitable extrusion ????

Anyway......Thanx for your help !!

Bob

Note...I have no rotary table...but, the process of of "Just keep flipping the hex in the vise and mill away " will work just fine !


Joined
Feb 25, 2010
Messages
1,643
Points
113
Found these...much better...26mm in height ea....so.....3 x 26 = 78mm....good !!….32mm vs. 36mm well...close....more hex bar mass...some reduction in fin area.....Thoughts ????


Thanx, Bob

Added...But.....we go from 20 fin to approx.48 fin !!!!
 
Last edited:
Joined
Jan 29, 2014
Messages
12,031
Points
113
Bob, after seeing the direction you want to go with that interal aluminum heatsink, I went searching for that and found something interesting:


This PDF document shows a few variations of internally finned tubes in fig. 1.2: http://www.diva-portal.org/smash/get/diva2:24268/fulltext01

Link below (photo above): These are not very big @ 19 mm diameter, but maybe we can find someone who makes a larger diameter one? If we cannot find them, I guess we will be forced to make our own. From what I've found online today, the fins should twist for maximum heat exchange from the air, or fluids for that matter.


How about just boring out the center of the hex aluminum and press inserting something like shown in the above link to push air through? With a tube like this, we won't need to work so hard on solving this part of the host.
 
Last edited:
Joined
Jan 29, 2014
Messages
12,031
Points
113
I have googled for two hours trying to find a larger diameter star tube like the unit I posted about last, but not finding it. Might be better to just machine the end of the hex bar down to a rod to tightly insert a few inches into one or two of these heat sinks embedded into the host tube:


85*55mm


Maybe mill out the center of what Bob found earlier or something like this and stack them on the back end of the hex rod somehow with room for a fan in front of it, or pulling from the end:

 
Last edited:
Joined
Feb 25, 2010
Messages
1,643
Points
113
Gentlemen...How about this !! Increased the Hex bar and Fin area by 25 % ! So...25% more mass...and 25% more fin area, Did this by extending the Hex Bar to 107.175mm. Now showing 6S LiPo cell pack riding on top.

I am still trying to figure out how to arrange the air flow in/out with the other ideas suggested.

CDBeam
 

Attachments

  • Green Gargoyle V2.12.JPG
    Green Gargoyle V2.12.JPG
    184.6 KB · Views: 5
Joined
Jan 29, 2014
Messages
12,031
Points
113
If that fan can pull the air through the host from the front side out the back end with just as much airflow, that makes more sense to me to keep the hot air separate from the input air. What do you think? I don't know it really matters, you could shoot the air upwards out a vent too, and pulled in anywhere which isn't on the top side of the host.
 
Joined
Feb 25, 2010
Messages
1,643
Points
113
ok...yet ANOTHER render V2.15....more details . I have now found another 48 fin heat sink.....41mm OD x 22.5mm ID ….x 30mm length ??? Using this one would yield more fin area...less Hex Ally mass ???? MMMMmmm…?? I think the current 32mm selection is fine....especially since we have increased the Hex mass and the Fin surface area....and we have the" Wind Tunnel Fan "on the backend. Your thoughts ???

CDBeam

Added.....This build will have the added utility of...A Nut Cracker....and Hand Warmer !!!! HAHAHA
 

Attachments

  • Green Gargoyle V2.15.JPG
    Green Gargoyle V2.15.JPG
    201.9 KB · Views: 4
Last edited:
Joined
Jan 29, 2014
Messages
12,031
Points
113
Bob, I like everything I see except the outboard boxy battery pack hanging on it, maybe we can use a fan which doesn't require so much battery and still have enough cooling for some decent run time.

Problem is, lacking experience with active cooling we don't know how much fan we need yet. So, as I see it, we need to either to just build the thing and see, or spend a lot of time investigating with power resistors etc. mocking something up to find out. If that much more battery is needed to have decent run time due to active cooling (what ever decent is as a matter of opinion), I can see a few ways to keep the unit looking and functioning cool:

1. Design the shape of the unit to incorporate both the fan and the diode power supply batteries into the main body making the host longer or wider on the end to hold more batteries.

2. Keep the basic design as is but without the box hanging on it, adding a corded power pack for extended run time instead.

3. Shorten the run time using a less power hungry fan and then no need for more batteries or the box hanging on it.

Maybe instead of using the battery box build battery tube cylinders which hang off the side and are round, maybe two or three of them? Two could be built to double as runners to set the unit down with, like a helicopter for a way to visualize it.

I donno, maybe I am wrong, but adding that external box fixed to the side kills the esthetics which are just as important to me as the amount of output power. Perhaps run the high volume fan at a slower speed so it doesn't need so much power for the fan and add an external DC power connector in the unit to allow adding an external pack if high volume air is needed for a longer run time. A switch could be added to toggle between low and high volume air with or without an external pack, but the batteries would drain much quicker.

Does anyone else think so?
 
Last edited:
Joined
Jul 10, 2015
Messages
9,985
Points
113
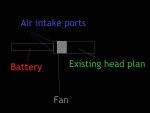
If building this for myself I would like to put the battery in front the fan inside the tube for ease of wiring and to keep a uniform dia. also the exit ports will be more of a restriction than blowing around the battery pack and not really going for 100% duty cycle but might be able to with just a small fan.

If this insane thing can run with tiny fans then so can 6 x 7475's at least for a minute or two maybe more, any moving air will be a big help, granted the LED's run hot but still think just a small flow of air will do a lot.

HTB1PT_aVSzqK1RjSZPxq6A4tVXa8.jpg


Joined
Jan 29, 2014
Messages
12,031
Points
113
I don't know what temperature the LED in that unit can run at, so maybe it doesn't need as much air? I have read a rule of thumb for laser diodes is every 10 degrees C higher in temperature the life is reduced by half.

Question is, how hot will it get? Here's an article showing how temperature reduces life expectancy:


Maybe we shouldn't care about running the diode at 75 C, considering how many total hours of run time we would actually use the pointer? I need to find if the 520 nm green laser diodes are more sensitive to higher temperatures than other diodes, if they aren't, maybe we shouldn't design so much cooling into this baby.

If the estimated life of the NDG7475 is 10,000 hours at 50 C. and using the lifetime halving every 10 degrees C. rule of thumb, if run at 60 C. 5,000 hours, 70 C. 2500, 80 C. 1250 hours. These hours are not to failure, they are to a point where it takes 20% more current to produce the same amount of output, if I am reading that article correctly.
 
Last edited:
Joined
Jul 10, 2015
Messages
9,985
Points
113
It could run without fans having only a solid hex bar core for some amount of time, but adding the center fins and moving air should increase the duty cycle quite a bit......however is it possible to have 100% duty cycle or until the battery is flat ? Probably but at what cost to the package ?
Either way as long as you don't overheat it all is well so manage your duty cycle which will depend on ambient air temp as well as active cooling, go with a compromise and find the duty cycle then observe it.

I also like portability and can see making a quad beam compact unit with no active cooling, just a short duty cycle, now this design is better but no need to go too far one way or the other, find a balance between the package and the duty cycle and build the next one differently if you like but I would not make what was intended to be portable a table top unless that's what you want.


---edit---

If you really want to have it all in the best size package then do the research, otherwise compromise towards the attributes that are the most important and make changes to version two......could plan to build a beta and test it before building the rest ??


---edit---

I might go with it as last drawn only with a battery pack placed inside, that hobby fan should work across a wide range of speed and should blow around a pack.
 
Last edited:
Joined
Jan 29, 2014
Messages
12,031
Points
113
Everything in life is a compromise for what is really needed but as human beings who want our burgers are way, we wanted wow for this host, not needed, but want it. To have it, we need to pay a price but I am not sure it is unrealistic to design a single tubular bodied 10 watt output 520 nm laser pointer which is a reasonable size without needing auxiliary batteries which can have enough run time.

How large a host and how much run time is reasonable? For time, 20 minutes total is enough for what I would do, but 40 would be awesome. The length of close to 330 mm isn't too huge to me, only thing I don't like is that rectangular or square battery pack mounted to the side of the host because I think it makes it too awkward looking.

RCB
I might go with it as last drawn only with a battery pack placed inside, that hobby fan should work across a wide range of speed and should blow around a pack.

Agreed.
 
Last edited:
Joined
Jul 10, 2015
Messages
9,985
Points
113
Another idea is to use the existing design only put a smaller dia. battery tube behind the main so intake ports can be around the perimeter.

replay3.jpg
 
Joined
Jan 29, 2014
Messages
12,031
Points
113
32650 batteries in the tube? I like that idea for the fan and if the air pushed out the back you could feel if it was getting too hot. I don't mind the host being longer either.

Edit: I found the life of the NDG7475 is specified at 50 C for 10,000 hours, not 25 C as I wrote earlier. Maybe we can run them to 70 C and still have 2500 hours of run time without dropping output too much, maybe even hotter if it helps us reduce the power load from cooling, but I like the 2500 hour life better than 1250 at 80 C.

I found some heat pipes on ebay yesterday, I wonder :)


Edit: Lookie this... might work for another host I want to build, although big at near 4 inches without being mounted inside something, ouch. Good news is already engineered for airflow through the heat sink fins, but of course, that is meant to shoot into a open compartment without much back pressure, but if fitted with one of those turbo RC fans will have the ability to do so.


https://www.ebay.com/itm/CPU-Cooler...-AMD-LGA-1150-1151-1155-1156-775/392418492822
 
Last edited:
Joined
Feb 25, 2010
Messages
1,643
Points
113
OK.....This is it ! See V 2.16 drawing attached.

Selected smaller EDF....reduced the fan from 70mm to 50mm dia...this fan also has a shorter overall length, uses a 3S LiPo cell pack vs 6S....Much less current hungry....2700 G thrust down to 650 G Thrust....but then....I think this will be adequate !!!!

Best news...you now have all components within the 101.6 mm diameter host tube. Had to increase the overall length by about 28mm. Got lucky with the available LiPo Battery pack configurations....as some of the length rides outside the motor circumference geometry.

In this iteration....we would use two (2) 2200 mAh LiPo cell packs ( See pack 1 / Pack 2) . Pack 1 for the fan....Pack 2 for the 6 x NDG7475 LD array.

If want more air flow....which I think is overkill....then the only alternative I see is the use of the dual Tubular Battery add-on units....as you had pointed out...like Helicopter Flotation pontoon's !!

The internal air channel arrangement around the LiPo cell packs also provides some space for a two (2) VDC digital meters to monitor each LiPo cell pack.
We could also add a very small digital temperature unit to monitor the Hex bar core temp. Watching these metrics would be advisable.

Run time....well.....Dunno ?? How long will 2200mAh power six (6) NDG7475's ?? How long will 2200mAh power our ED Fan ??

In my opinion, we have a possible workable design....with the ascetics required....and not violating the Laws of Optics or Physic's !! Magik Mirror indeed !!!

Thoughts ??

CDBeam
 

Attachments

  • Green Gargoyle V2.16.JPG
    Green Gargoyle V2.16.JPG
    211.4 KB · Views: 7
Last edited:


Top